


4 Cheese Mac + Cheese

HALF RECIPE:
1/2 Lbs Macaroni Pasta
2 Tbs Unsalted Butter
1/2 Large Onion
2 Cloves of Garlic
2 Tbs All Purpose Flour
3/4 Cup Whole Milk
4 Cups Cheese, Gruyere, Parmesan, Fontina, Cheddar
Salt
Cook Pasta 1 to 2 minutes shy of packaged directions. In the meantime, Melt butter and saute onions and garlic until soft and translucent. Add Flour and cook for 1 to 2 minutes. Add milk and stir/whisk till it is combined in mixture. Bring to a boil and reduce to a simmer, let simmer until thick, about 5 minutes. Add in 3 cups of cheeses and stir until combined. Combined cheese sauce with pasta and transfer to a baking dish. Top with the remaining cup of cheese and broil till the top is crusty and brown. ENJOY!
FULL RECIPE:
1 Lbs Macaroni Pasta
4 Tbs Unsalted Butter
1 Large Onion
4 Cloves of Garlic
4 Tbs All Purpose Flour
1.5 Cup Whole Milk
8 Cups Cheese, Gruyere, Parmesan, Fontina, Cheddar
Salt
Cook Pasta 1 to 2 minutes shy of packaged directions. In the meantime, Melt butter and saute onions and garlic until soft and translucent. Add Flour and cook for 1 to 2 minutes. Add milk and stir/whisk till it is combined in mixture. Bring to a boil and reduce to a simmer, let simmer until thick, about 5 minutes. Add in 6 cups of cheeses and stir until combined. Combined cheese sauce with pasta and transfer to a baking dish. Top with the remaining 2 cups of cheese and broil till the top is crusty and brown. ENJOY!

You might also like these recipes:
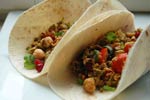
 Brocolli Tacos
 Cheese Ravioli
 Butter Free Garlic Bread
 Sweet Potato Souffle
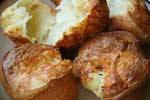
 Popovers
 Leave a Comment